How to Make a Custom Site Survey Form
How to Make Custom Site Survey Form

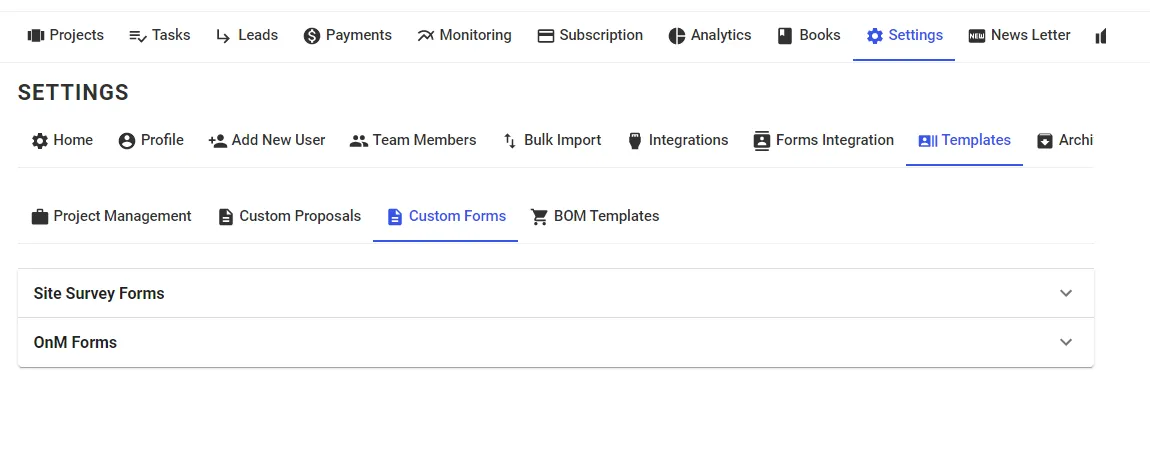
Step 1: Go to Settings --> Templates --> Custom Forms
Step 2: Click on New Template and a Form Called Untitled Form will be created. Click on it.
Step 3: Select Fields on the Left according to the form you want
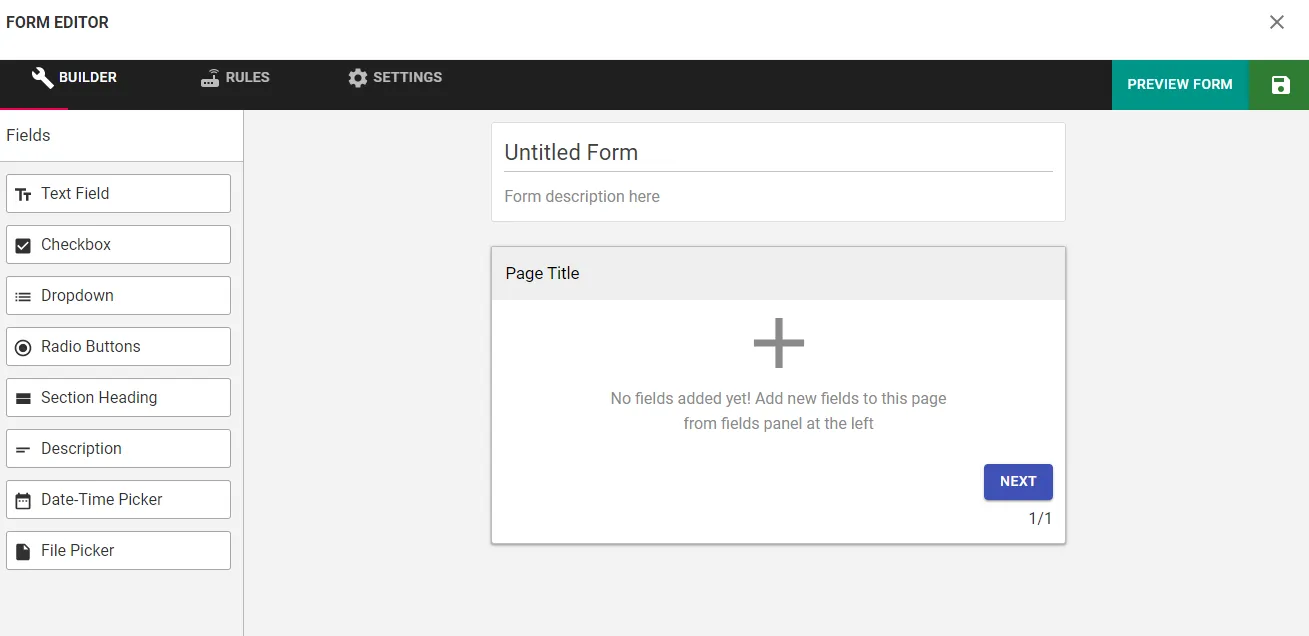
Step 4: Click on the Save icon on Top Right to save the Form
Tips:
- Any field can be made compulsory by clicking on the Field and Making the Validation as Required.
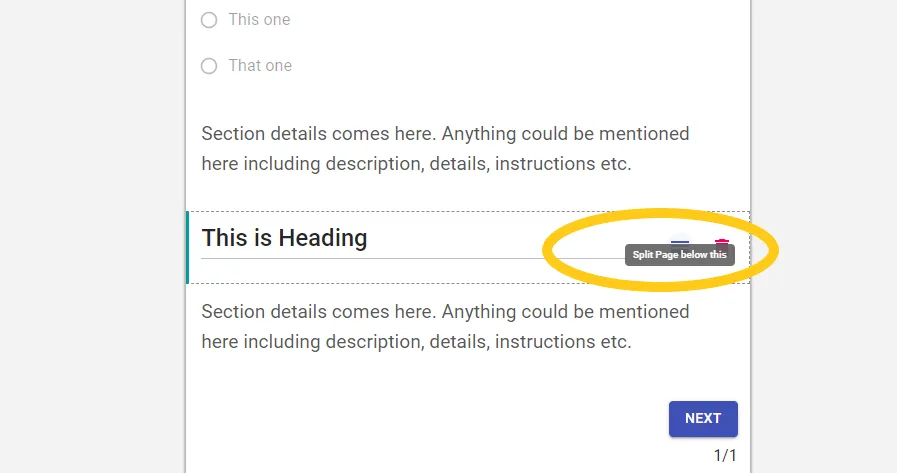
- You can create a form with multiple pages by Splitting the form. Click on Split Icon that appears when hovering over a Field.
Related Articles
How to Edit Customer Information
How to Edit Customer Information Step 1: Open the concerned project Step 2: Go to Edit Customer Tab and make desired changes Step 3: Click on Update Project at the bottom of the page to Save the changesHow To Add A New Project Lane
How To Add A New Project Lane Step 1: Go to Settings and Click on Home Step 2: Scroll Down to your Project Lanes and decide the Position of the New Lane For Eg. Lets say you want to add a Lane called Site Visit 2 between Proposal and Design, since ...How To Add A New Project
How To Add A New Project Step 1: Go to Project Dashboard and Click on + Add Project Step 2: Enter Customer Details Step 3: Select the "Project Lane" to which you want to add this project to Step 4: Select the Member you want to Assign the Project to ...Delete/Archive a Project
How to Delete/Archive a Project Step 1: Go to Projects Tab and Open the project you want to delete Step 2: Go to Archive Tab in the project and Click on "Click Here to Archive this Project" Step 3: Click on OK The project will get archivedHow To Add Project Members In A Project
How To Add Project Members In A Project Step 1: Open the Project you want to add a member to and Go to Project Members Step 2: Select the User you want to add from the list of Team Members Step 3: Click on Give User Access and then Press OK New ...